Abbieshire
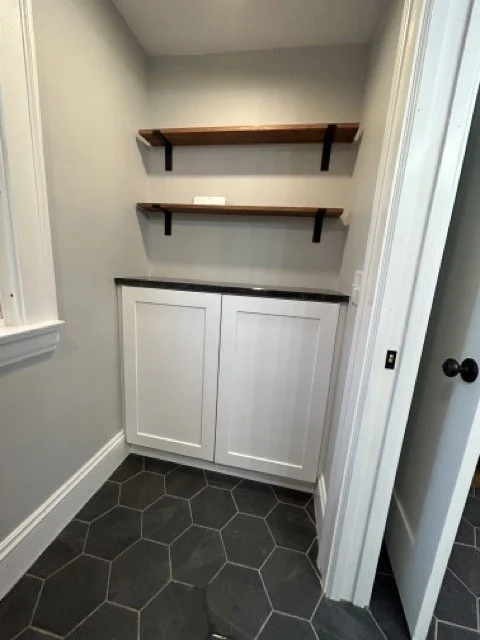
Just one block from the lake, Abbieshire is a street with quaint and historical homes built during the roaring 20’s, and this 3 bedroom 2 bathroom home was an excellent choice for a master bathroom addition. The master bedroom with a closet also featured a 7x14 adjacent room that the owner’s used as a modest sitting area.
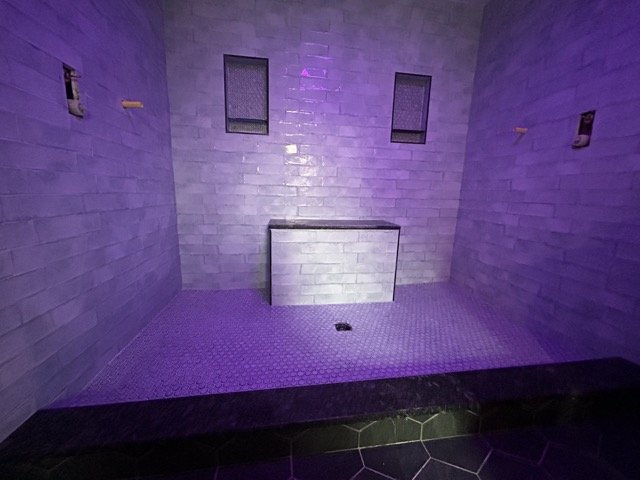
The most immediate concern was that, although natural daylight is ideal, some windows had to be removed in order to achieve a layout that would create the ability to install a his-and-hers shower and a 60” wide sink. The client also wished to have an adjacent water closet with a pocket door, which meant that one of the windows was able to be saved. It was agreed that this layout was possible while still providing ample lighting with the use of LED recessed lights, vanity lights, and bluetooth-enabled exhaust fans with a speaker which were also equipped with LED color-changing lighting.
The second obstacle was that, since the home was built in 1927 and experienced some settling, a repair attempt needed to be made to level the floors so the shower floor would be pitched correctly to drain water after the shower pan was installed. It would be necessary to completely remove the engineered hardwood floor, subfloor, and plane the joists down about about an inch (to zero) over a span of 6 feet to compensate for the un-level floor and make it level (or as close to level as possible) once again.
Experiments were performed off-site to ensure that furring the walls out and installing closed-cell insulation with closed-cell foam would prevent water in PEX supply lines (water lines) would not freeze during cold snaps. A box filled with water, and made of paulownia to emulate exterior sheathing with Kerdi-fix and closed cell foam and insulation were placed in a controlled environment of -10 degrees yielded positive results; the water did not freeze over a 12-hour cycle.
Lastly, since this room was never a bathroom—which meant that all new mechanicals needed to be installed. Dedicated circuits for the heated floor, outlets, and lighting were installed. Downstairs, a small section (stud bay) of plaster and lathe was removed to install a new 3” waste stack for the drains. A separate 2” drain would be installed from the basement to the second floor master bathroom for the sink and shower drain.
Drawings were devised, and we got to work.
Once demo, joist adjustments (planing and leveling) and mechanicals were completed, we installed the 3/4” plywood subfloor and framing to accommodate a 30” pocket door and partition wall for the adjacent water closet (toilet and storage), including the rough-in opening for a 30” pre-hung solid door for the main entrance to the master bathroom from the master bedroom.
After that, we installed drywall and arrived to one of the most important phases of any bathroom renovation project: waterproofing. We installed Schluter K-board, banding, the shower pan and curb after pouring leveler to make absolutely sure water would flow down the drain correctly after the shower pan was installed. Schluter All-set was used to adhere the DITRA for the heated floors as well.
Choosing the right tile that would compliment both functionality and aesthetic proved to be a challenge since the size of the shower could easily make the shower walls appear ‘busy’, especially if small tiles were used. I recommended against using subway tile, but the client wanted a smaller tile that was 3x12. The tile, however, was wider and textured giving the illusion of a continuous flow that would contrast well with the larger hexagon main floor tile and matching black MOEN hardware (M-series valves with integrated transfers to attachments).
Finally, the shower glass was installed along with the vanity, toilet, fixtures, and other features.


